Before sharing sensitive documents, it is common to sign a NDA.
You can require all participants (including yourself) to sign a document via Docusign before being granted access to the data room.
Activate the option on the Settings page
Step 1: activate the option
If you are a Project Manager, you can activate the option on the Settings page.
In the Confidentiality agreement section, click on Activate.

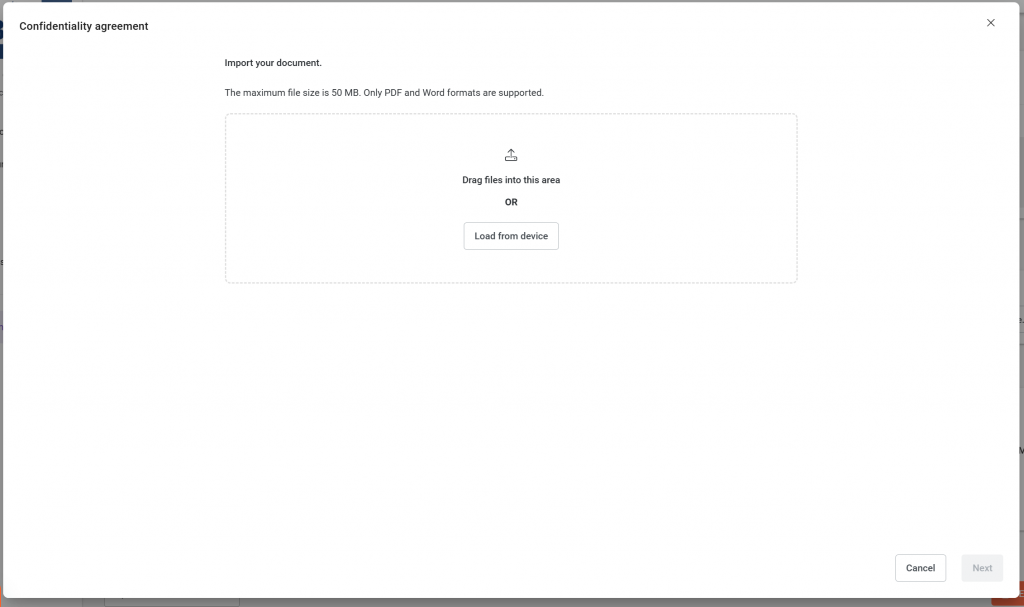
Step 2: Upload your file, PDF or Word. File must be less than 50MB.
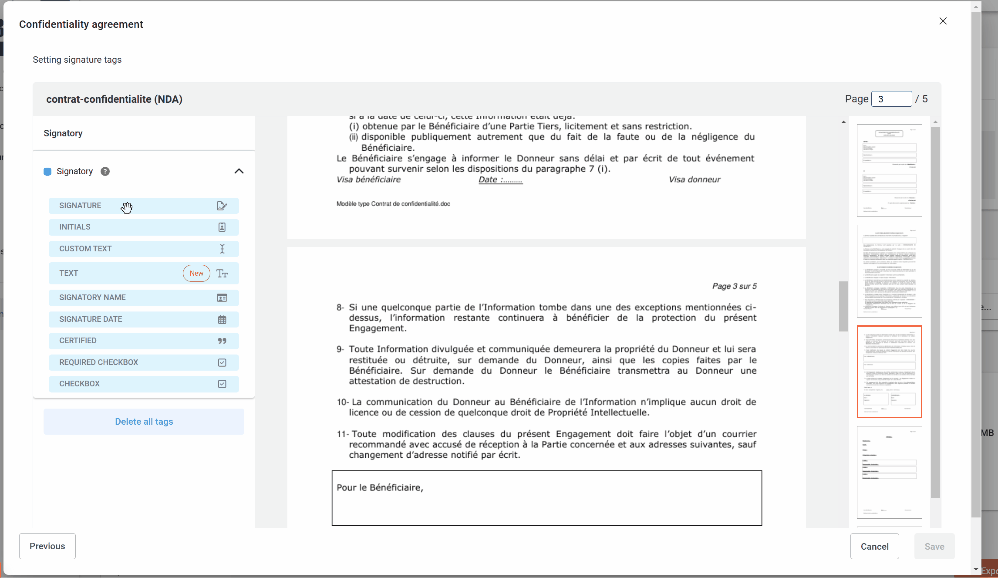
Step 3: Prepare your document
Place your signature tags. At least one signature tag is mandatory. The signature tag is where the signatory will click to sign.
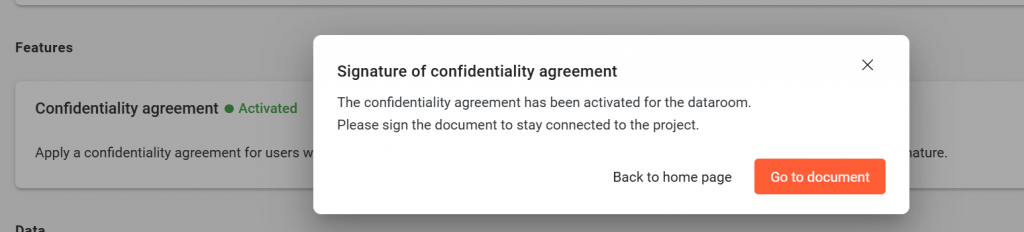
Step 4: Sign your NDA
You will be automatically redirected to the settings page as soon as you have saved your document on step 3. To maintain your access to the data room, sign the NDA by clicking on go to document.
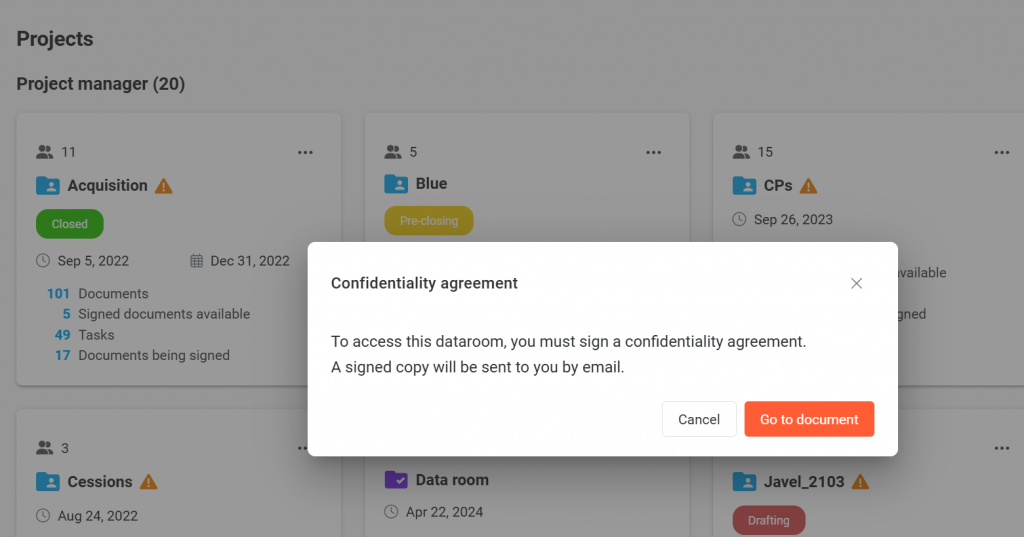
What does my guests see if they haven’t signed yet?
When trying to access the project, a warning message will appear requesting the signature of the NDA.
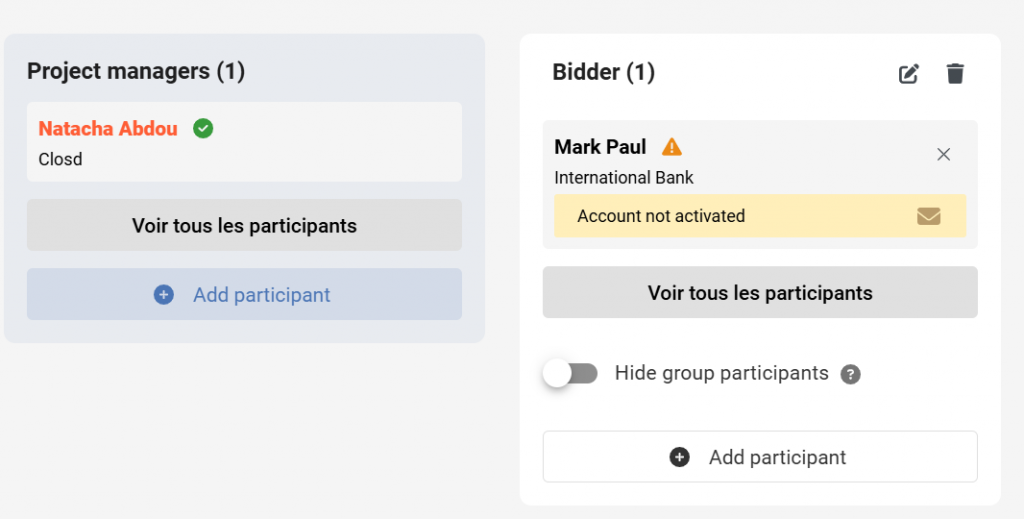
Who signed the NDA?
Go the Participants page to track the signatures.
Green tick on the participant’s card = the participant has signed the NDA and can now access the data room.
The attention symbol = the participant has not yet signed the NDA and cannot yet access the data room.
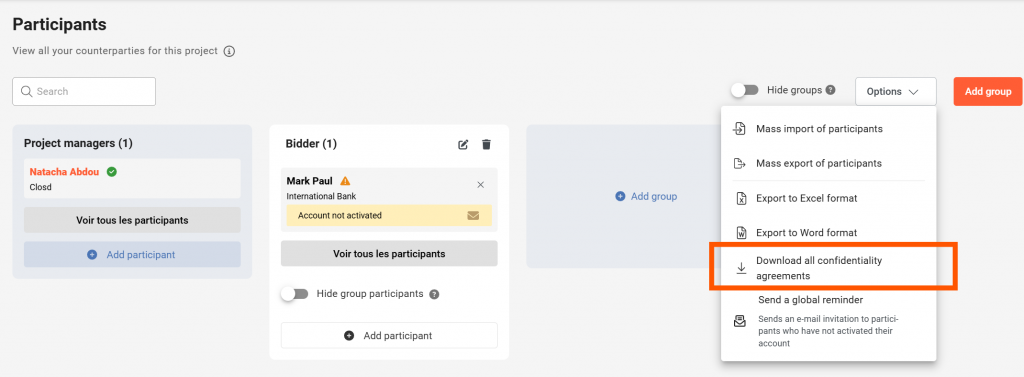
How to download the signed NDAs?
- Go to the Participants page
- Click on Options then Download all confidentiality agreements
Only Projects Managers can download the signed NDAs on the Participants page.
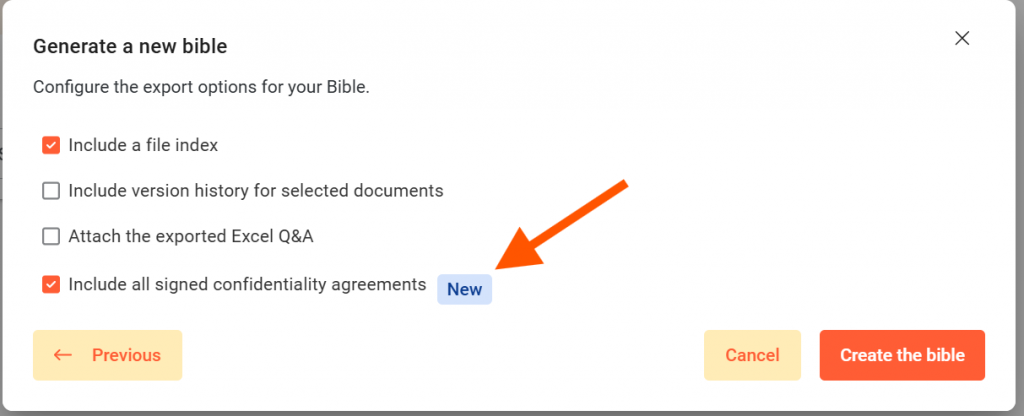
You can download your signed NDA on the page Bible.
When creating your Bible, select “Include all signed confidentiality agreements” on the configurations options.